MAY 18, 2020
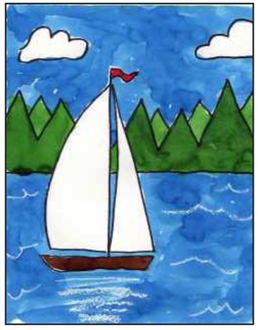
🌊 SAILBOAT ON A LAKE 🌊
⛵
⛵
SUMMER IS ALMOST HERE!!! LET'S DAYDREAM ABOUT SAILING ON A BOAT ON A BEAUTIFUL LAKE ... WOULD YOU LIKE TO BE THERE RIGHT NOW? I BET! ME TOO!
LET'S DRAW IT STEP BY STEP ->
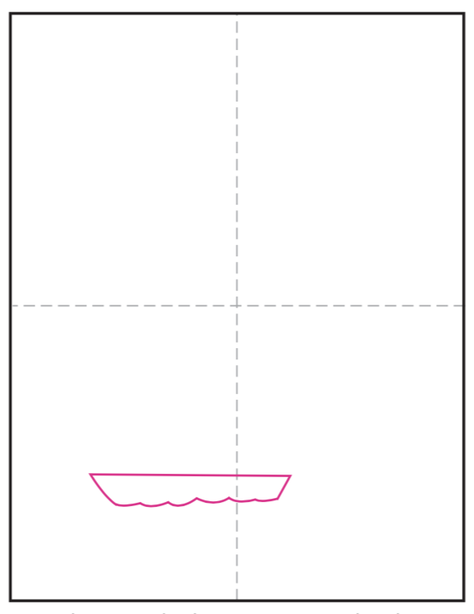
First, we begin with the actual boat. Let's draw this shape below the half line of the paper.
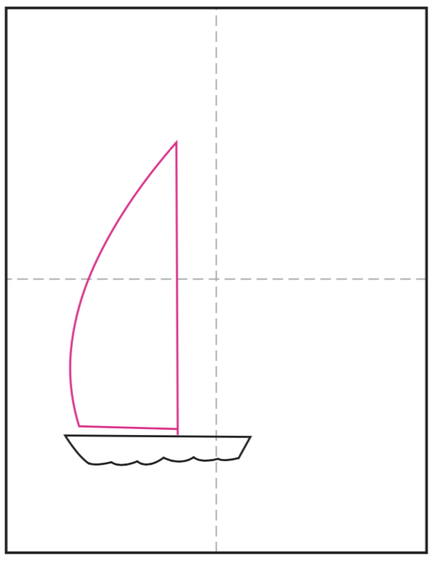
Then, the mainsail on the left side. This goes BIG!!!
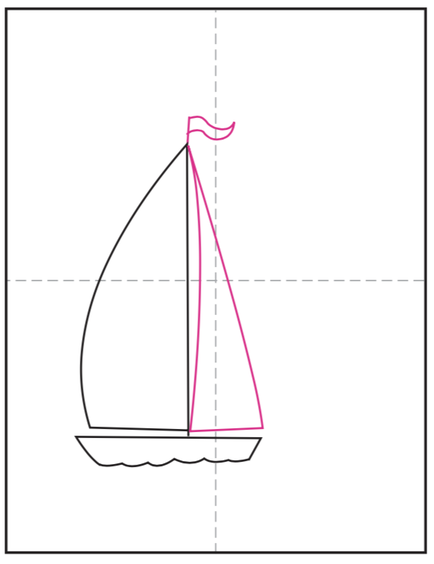
Now, the one on the right. A little bit smaller and skinnier.
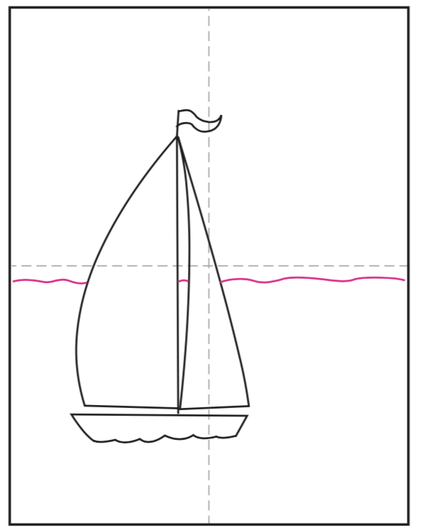
Next, the water line. Make it curvy. Do not draw inside the sailboat.
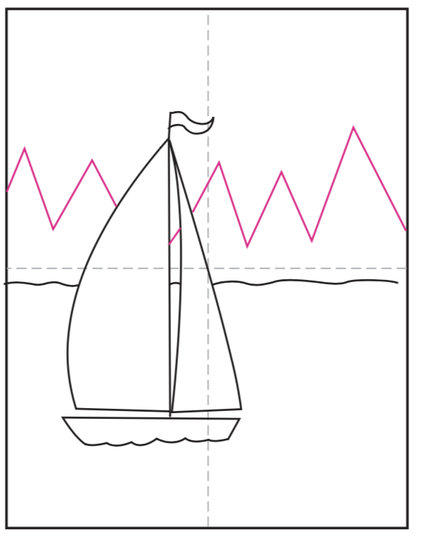
Now let's think about the background. Draw a big zig-zag line across. This line can be trees or hills.
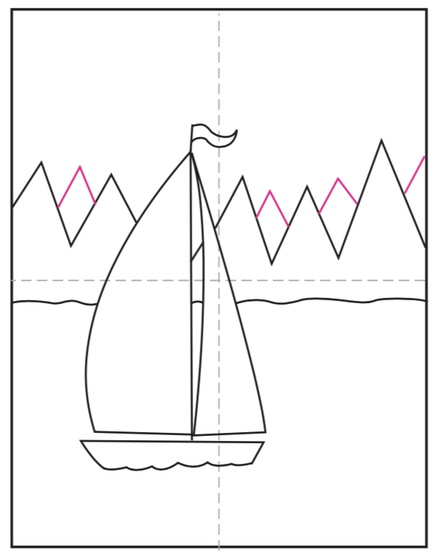
And we add some extra triangles in between.
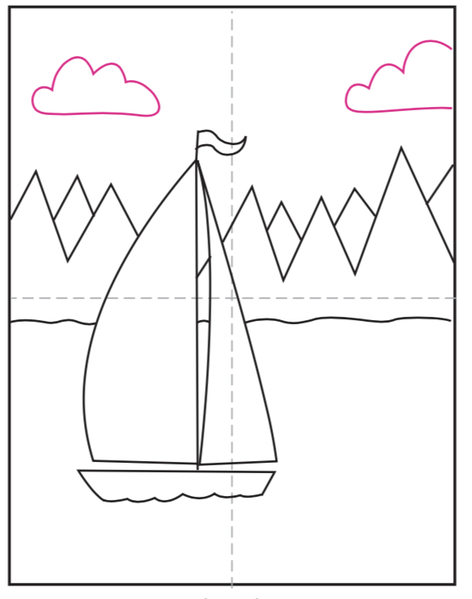
Clouds always make everything look nice and complete.
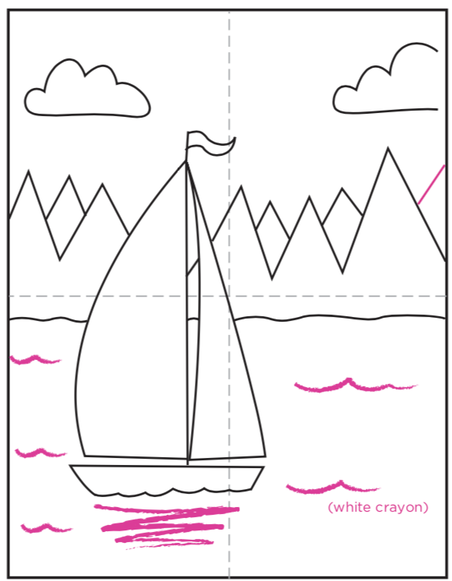
DETAILS- For details, we can add waves to the water. BE CREATIVE! you can also add, fishes, birds, a sun, or even people on the boat.

Finally, we paint or color. The sailboat can be any color or colors!
⛵
Now if what you want is to make a sailboat! check out this video!! and try it!!I used to love ♡ making these when I was little! -Paper can be any kind any color.
MAY 05, 2020
.💐 MATISSE FLOWERS FOR MOM 💐.
💗
LET'S GIVE MOM SOME FLOWERS FOR MOTHER'S DAY
WE CANNOT GO TO THE STORE TO BUY ANY FLOWERS OR CARDS, BUT WE CAN MAKE SOME!
THERE ARE 2 IDEAS 💡 IN THIS POST SO MAKE SURE TO WATCH ALL THE VIDEOS AND SCROLL ALL THE WAY TO THE BOTTOM.
Be prepared with white paper, pencil, eraser, markers, and colors.
TIP: Always begin with pencil so we can erase just in case.
FIRST, WE WILL LEARN A LITTLE ABOUT THE FAMOUS ARTIST HENRI MATISSE WITH THE FOLLOWING VIDEO:
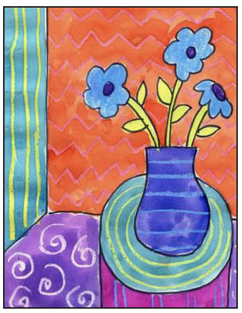
NOW THAT WE KNOW A LITTLE ABOUT HIM, WE CAN DRAW THESE BEAUTIFUL FLOWERS CALLED "MATISSE FLOWERS" FOR MOM.
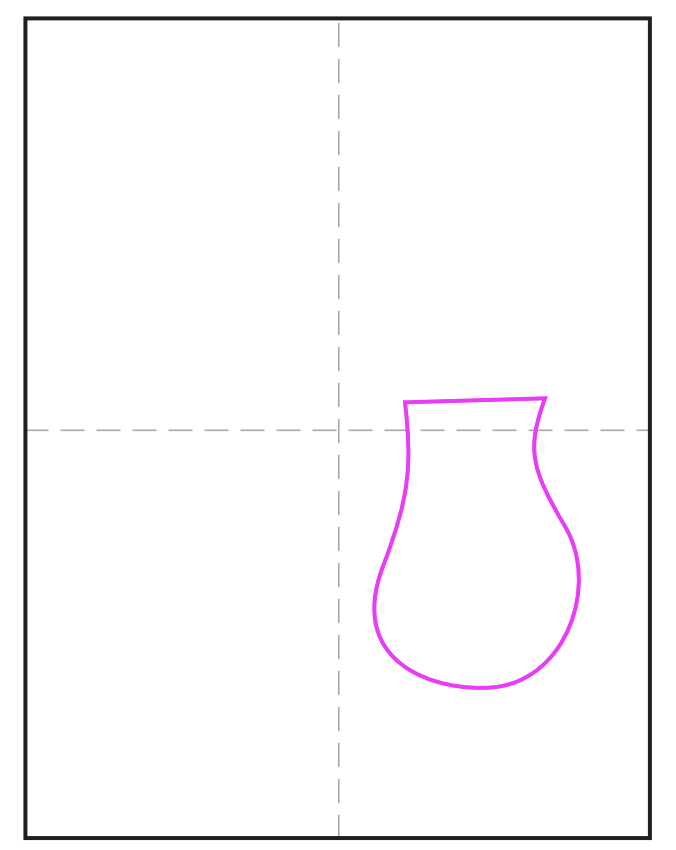
First, we draw the vase. make sure to draw it off-centered (not in the middle, a little to the side)
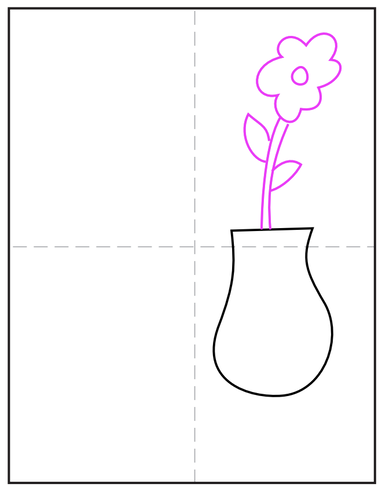
Now, we draw the first flower. If you prefer another type of flower go head and try it.
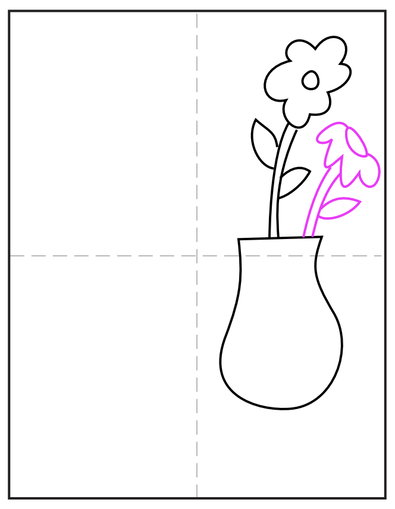
Then, we make a smaller flower next to it.
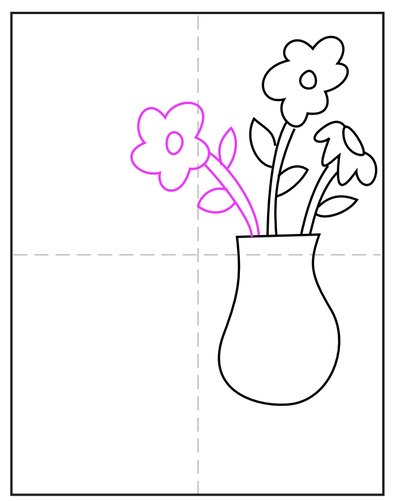
On the other side, we draw the third flower. This one hangs a little. DO NOT FORGET THE LEAVES.
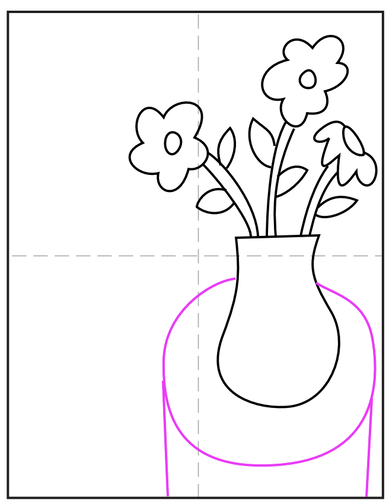
Then, the table. A little tricky, but you can do it. Pay attention to circle, make sure your flower vase is not floating!
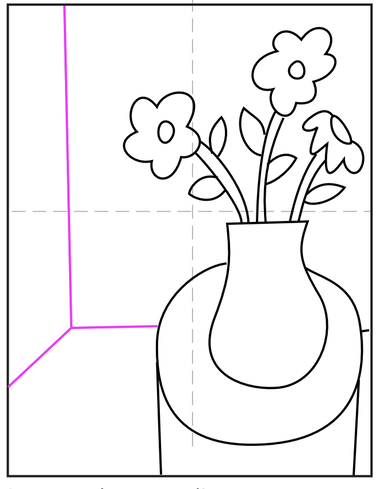
Now we go to the back. Draw 3 lines. These lines make it look like the flowers are against the wall in a corner.
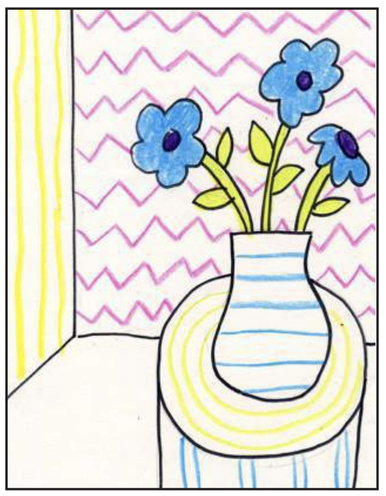
Now the fun part, using crayons or markers, we draw patterns!!... zig-zags, poka dots, lines, squares, hearts.
BE CREATIVE!
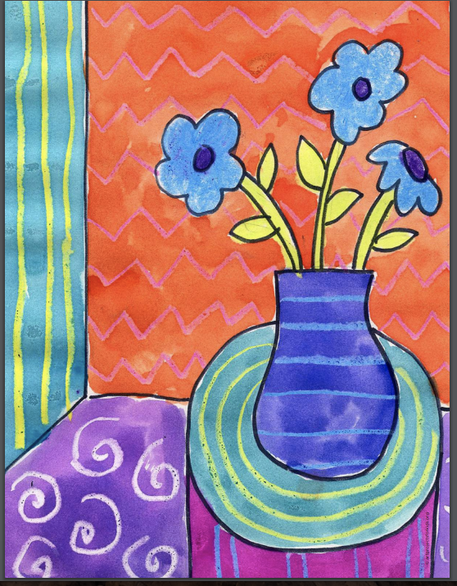
Finally, we color everything else in the picture!... if you have paint you can paint on top of the crayons.
DO NOT FORGET TO ADD A MESSAGE FOR MOM ♡
👀 FUN CHALLENGE:
💜💜💜
If you have glue, scissors, and color paper at hand... this is something fun you may want to try!!! ♡ (CLICK PLAY)
💜💜💜
If you have glue, scissors, and color paper at hand... this is something fun you may want to try!!! ♡ (CLICK PLAY)
APRIL 28, 2020
HELLO GUYS!! READY FOR A NEW LESSON? THIS IS A COLORFUL ONE.
WE WILL DRAW A RAINBOW CHAMELEON!
👀 Check out at the end for FUN challenge! 👀
Be prepared with white paper, pencil, eraser, markers, and colors.
TIP: Always begin with pencil so we can erase just in case.
🌈🦎 RAINBOW CHAMELEON 🦎🌈

->FIRST LET'S GET TO KNOW CHAMELEONS A LITTLE BETTER WITH THIS VIDEO BELOW: CLICK PLAY->
NOW, LET'S WORK STEP BY STEP:
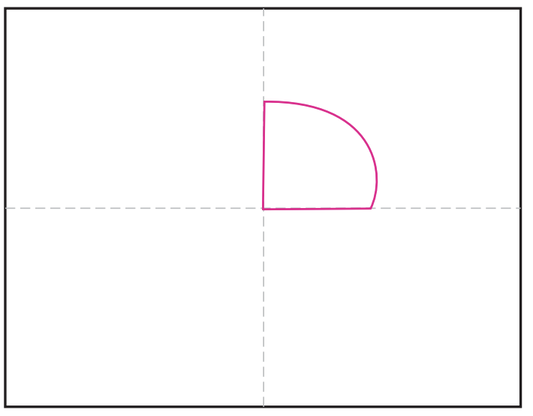
Let's start by folding your paper in half so you know where to start. Then, Do a quarter-circle shape; this is the head.
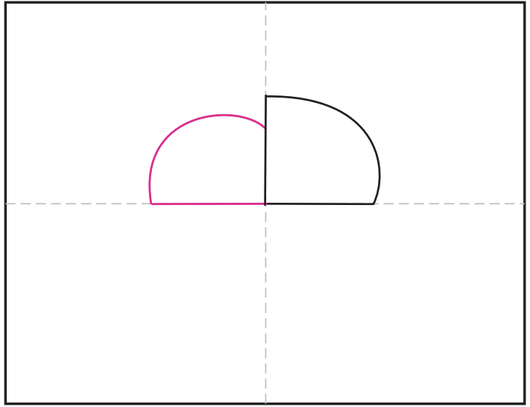
Next, let's do a simple round body attached to the head.
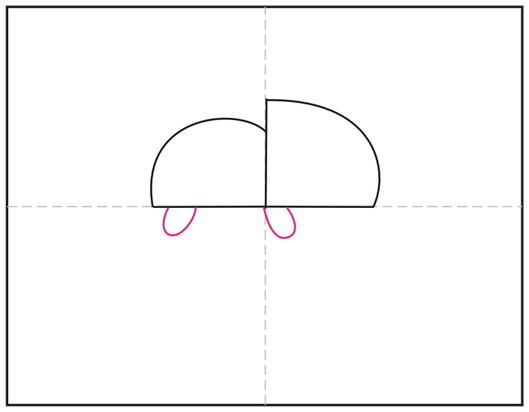
Add two small round legs.
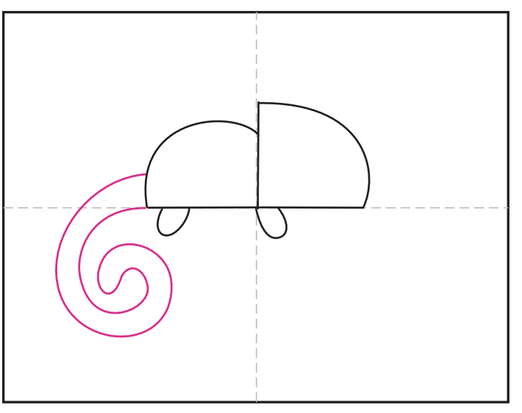
Now, this part is tricky. We will add a curly tail attached to the body. Like a monkey tail!
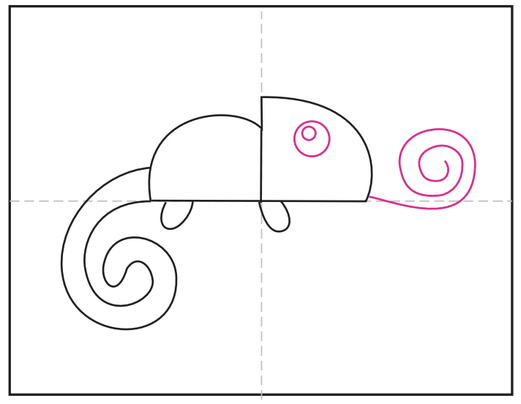
One BIG! eye, and a super curly tongue!
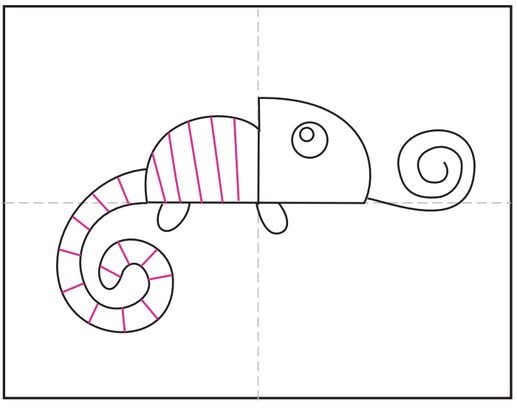
Now, go ahead and draw some stripes. The rainbow colors will go here.
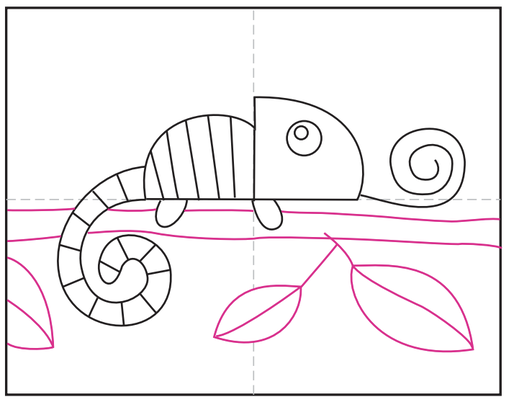
The chameleon needs a nice big branch to stand on. Add big leafs to it.
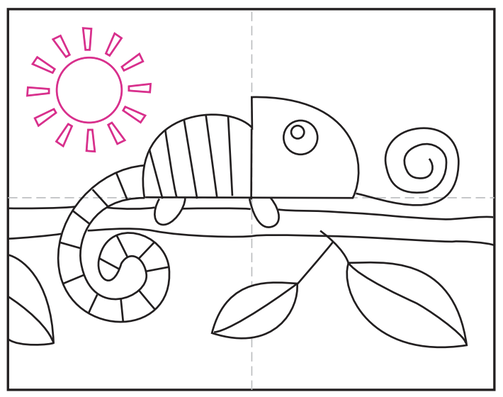
Here comes the sun!

|
Finally the coloring part:
|
👀 FUN CHALLENGE:
If you have glue, scissors, and color paper at hand... this is something fun you may want to try!!! ♡ (CLICK PLAY)
*Chameleon can be any color!
If you have glue, scissors, and color paper at hand... this is something fun you may want to try!!! ♡ (CLICK PLAY)
*Chameleon can be any color!
April 21, 2020
HELLO LITTLE LIONS!! WELCOME BACK!!
THIS WEEK WE WILL WORK ON THIS SNAIL DRAWING.
Remember to invite your siblings to draw with you, or video call a classmate to draw together!
👀 Check out at the end there's a extra challenge 👀
Be prepared with white paper, pencil, eraser, markers, and colors.
TIP: Always begin with pencil so we can erase just in case.
NOW, LET'S WORK STEP BY STEP:
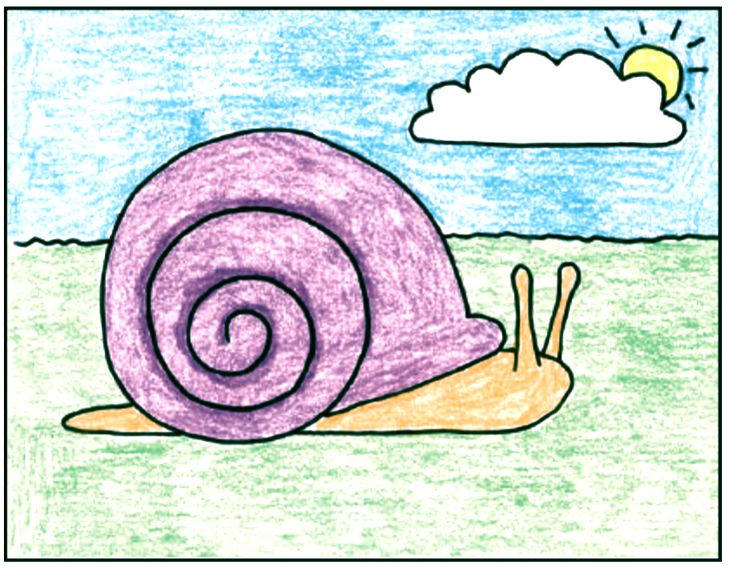
This is more less how it will look at the end. But remember, be creative!!! you can always change the colors, add a patterns on the shell, or details like flowers on the grass, or maybe a friend snail! :D
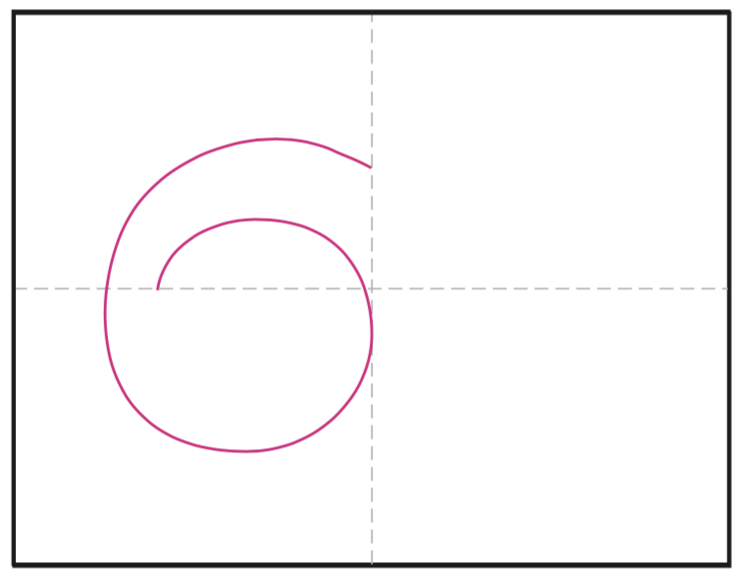
Let's start with a 6 shape, but we will continue the line until it turns into a spiral...
This will be the shell.
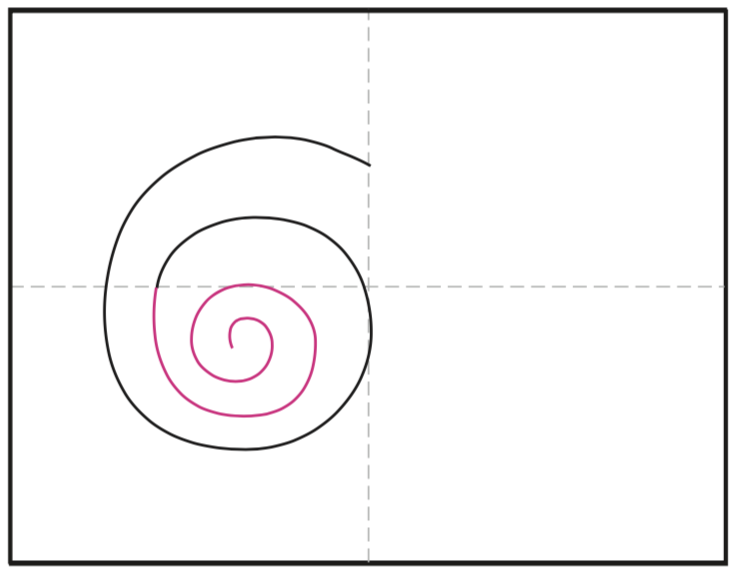
Now let's add a swirl inside the 6 shape to form that spiral.
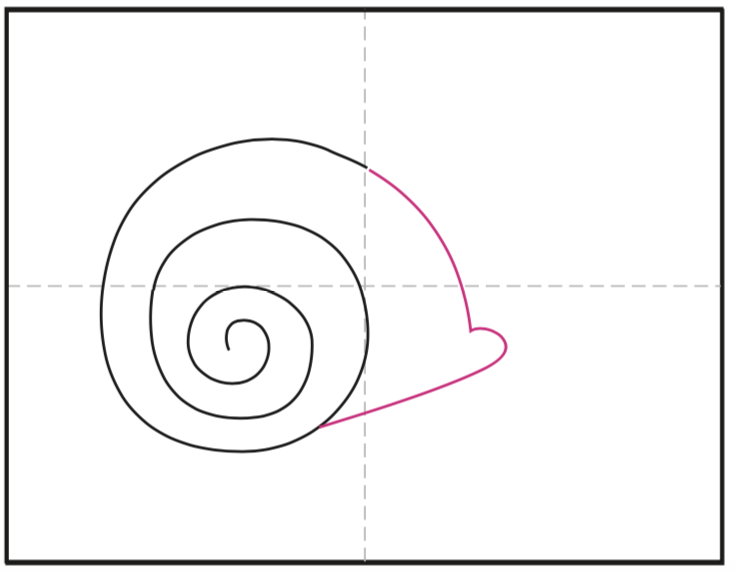
Now, let's close the shell with a small boot shape
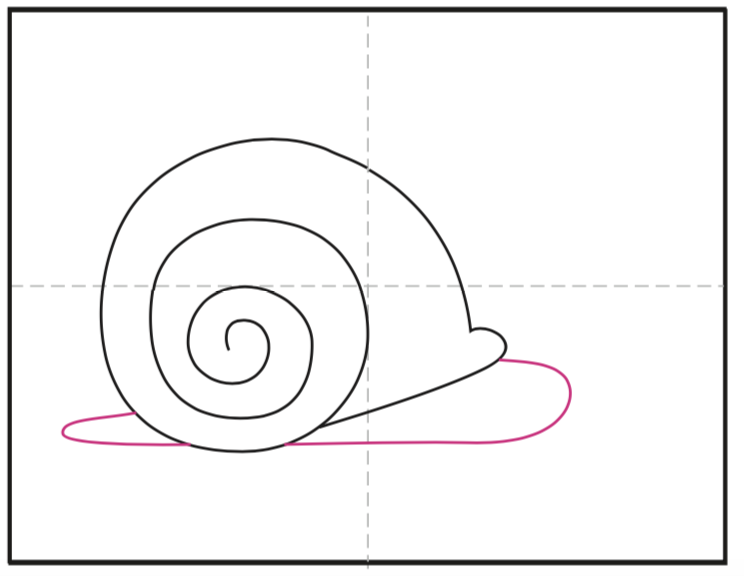
Then, we add the snail body bellow the shell shape. Do not forget the tail.
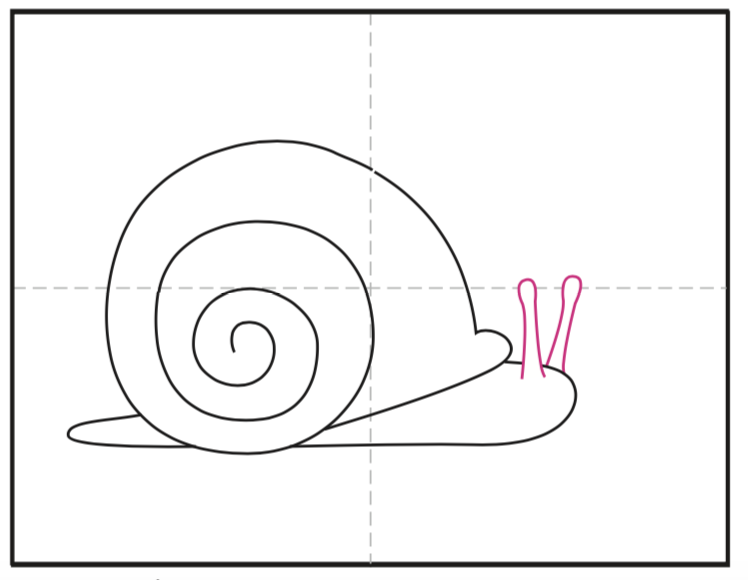
Draw the antennae! These are actually their eyes! amazing!
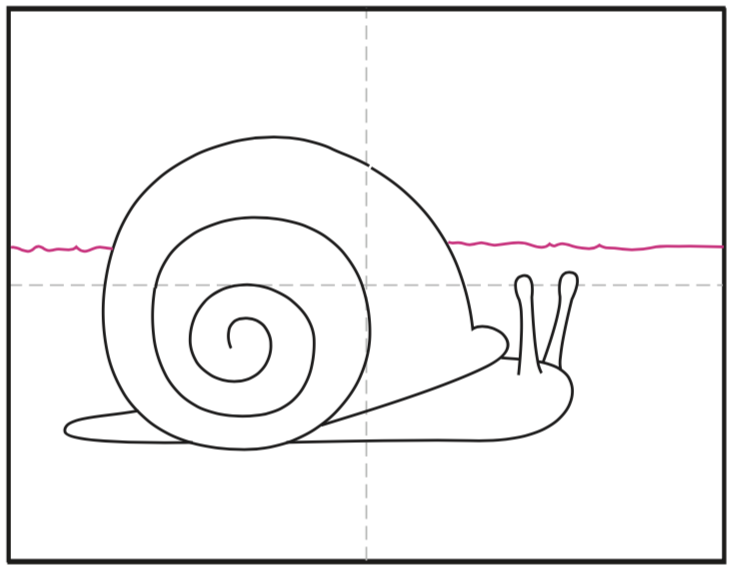
Let's add the horizon line, or the "ground" line. You can also draw zig-zag lines like grass :)
Do not forget the flowers!
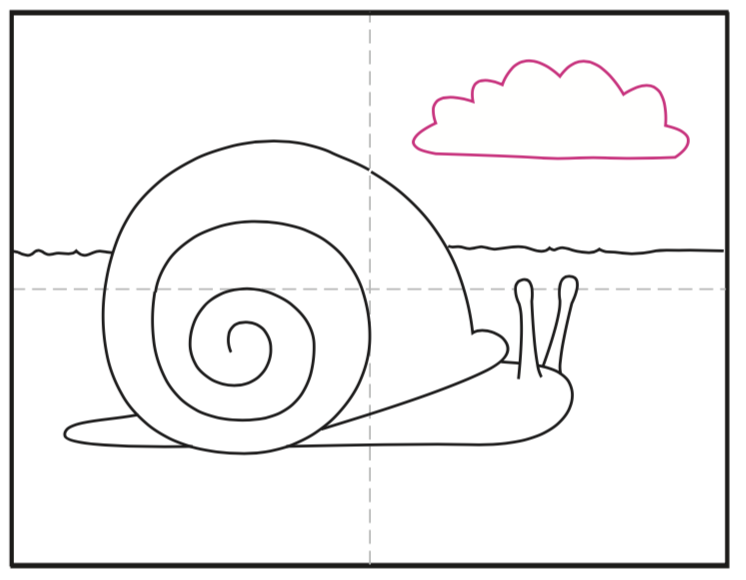
Now some clouds...
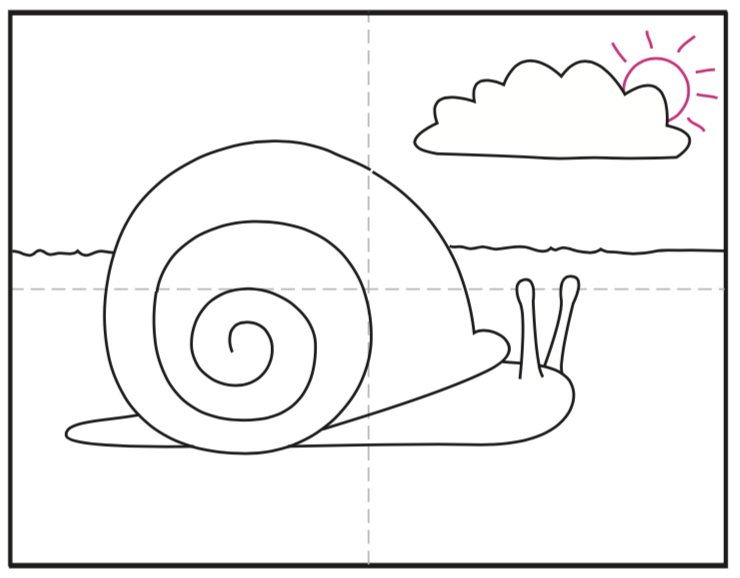
And the sun!
VOILA!
Now let's trace with markers if you have some, and color everything NICE and EVEN.
**REMEMBER!! BE CREATIVE WITH YOUR COLORS, ADD PATTERNS LIKE POLKA DOTS ON THE SHELL, ADD FLOWERS, AND DETAILS, TOO. OR WHAT ABOUT A FRIEND SNAIL?? :D
DO NOT FORGET TO TAKE A PICTURE AND SHARE WITH US!
CLICK HERE TO SHARE!

👀 FUN CHALLENGE:
If you have glue, scissors, and color paper at hand... this is something fun you may want to try!!! ♡ (CLICK PLAY)
If you have glue, scissors, and color paper at hand... this is something fun you may want to try!!! ♡ (CLICK PLAY)
APRIL 14, 2020
HELLO LITTLE LIONS!! THIS WEEK WE WILL WORK ON THIS CUTE EASTER DRAWING. INVITE YOUR SIBLINGS TO DRAW WITH YOU.
Be prepared with white paper, pencil, eraser, and colors.
NOW, LET'S WORK STEP BY STEP:
Be prepared with white paper, pencil, eraser, and colors.
NOW, LET'S WORK STEP BY STEP:

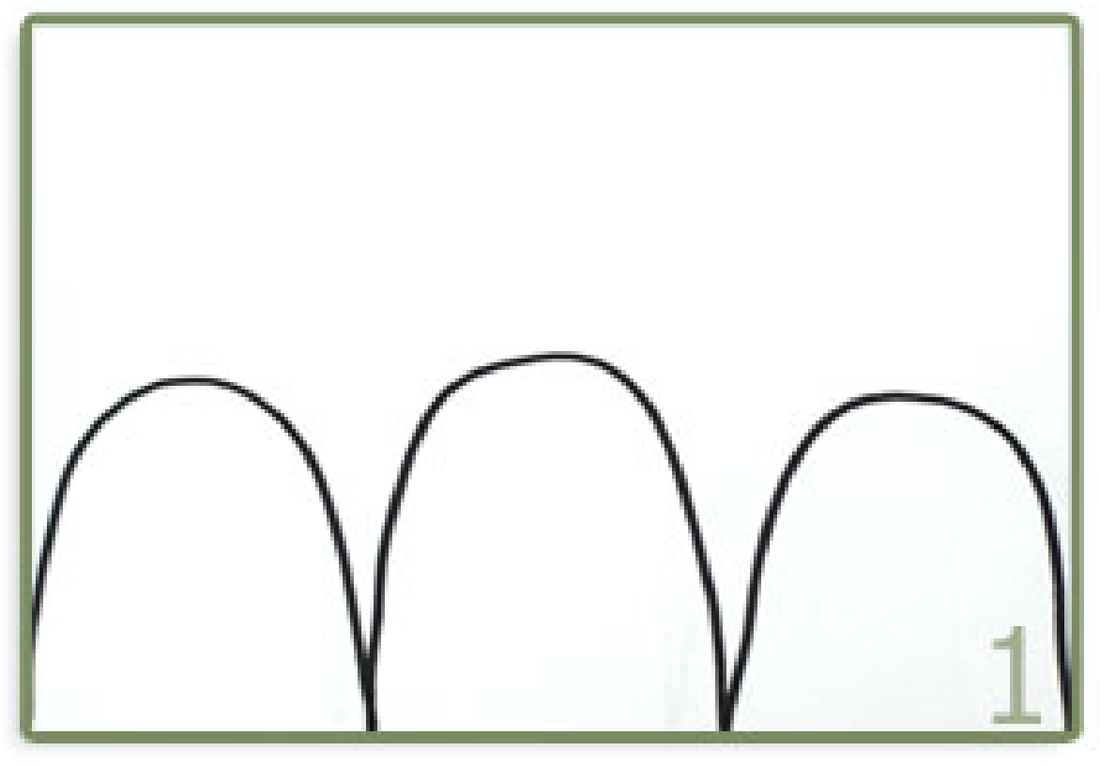
Let's begin with 3 bumps on the bottom of the page. Let's draw them BIG! make sure you go from the beginning of the page all the way to the end -->.
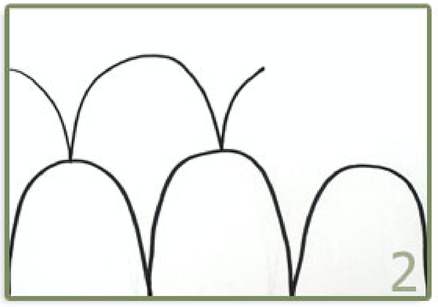
Now, we will repeat the same bumpy lines on top of the ones we already drew. This time there will be 4 bumps.
It should look something like this ^^^
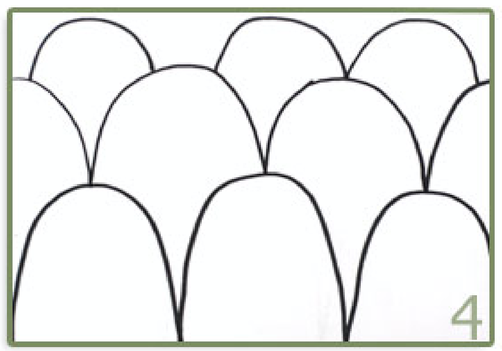
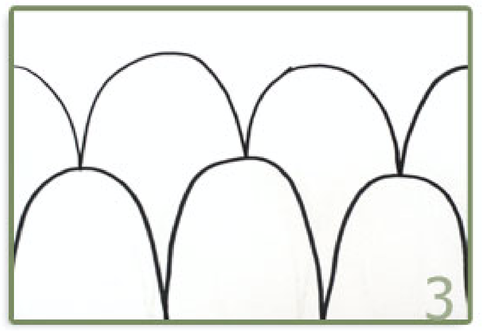
Last 3 bumps. Let's arrange them on top and in between the other 4.
Like bricks.
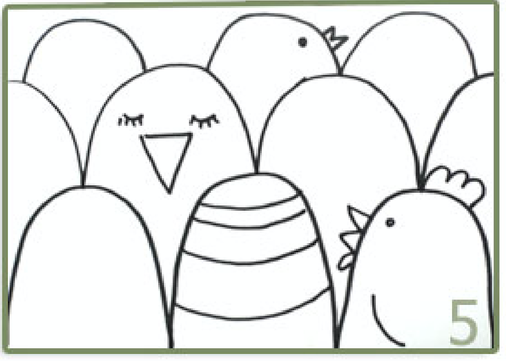
Now the fun part! It is time to decorate each of those hill-like shapes. Some of them will be eggs and some will be chicks.
We need to add details: eyes, beaks, and wings to the chicks.
On the easter eggs we need patterns, lines, and polka dots.
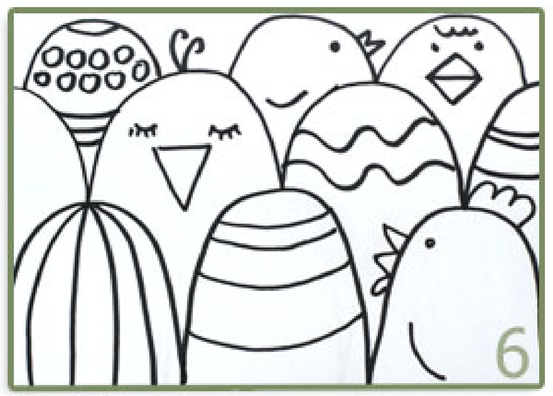
Some chicks may be facing to the front and some to either side.
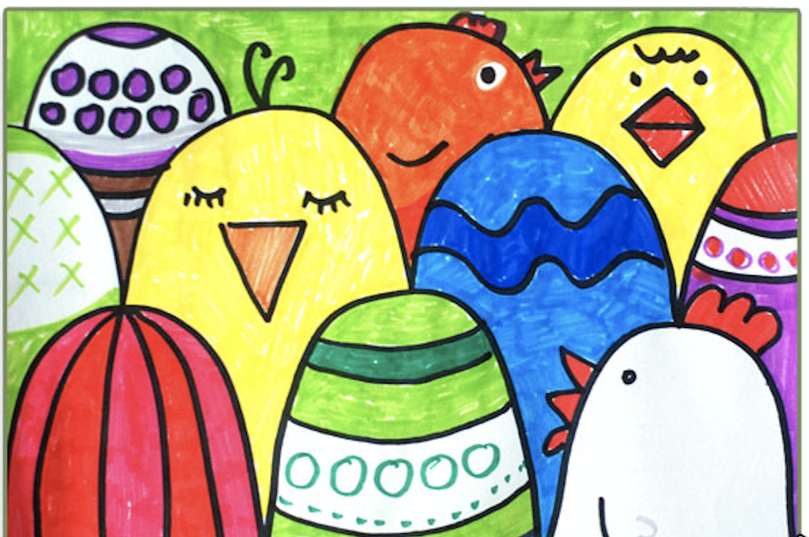
Finally, the coloring part!! If you have markers you may trace with them or with a sharpie. Be creative with your color combinations.
On the bottom you may write your name with the caption "Easter 2020".
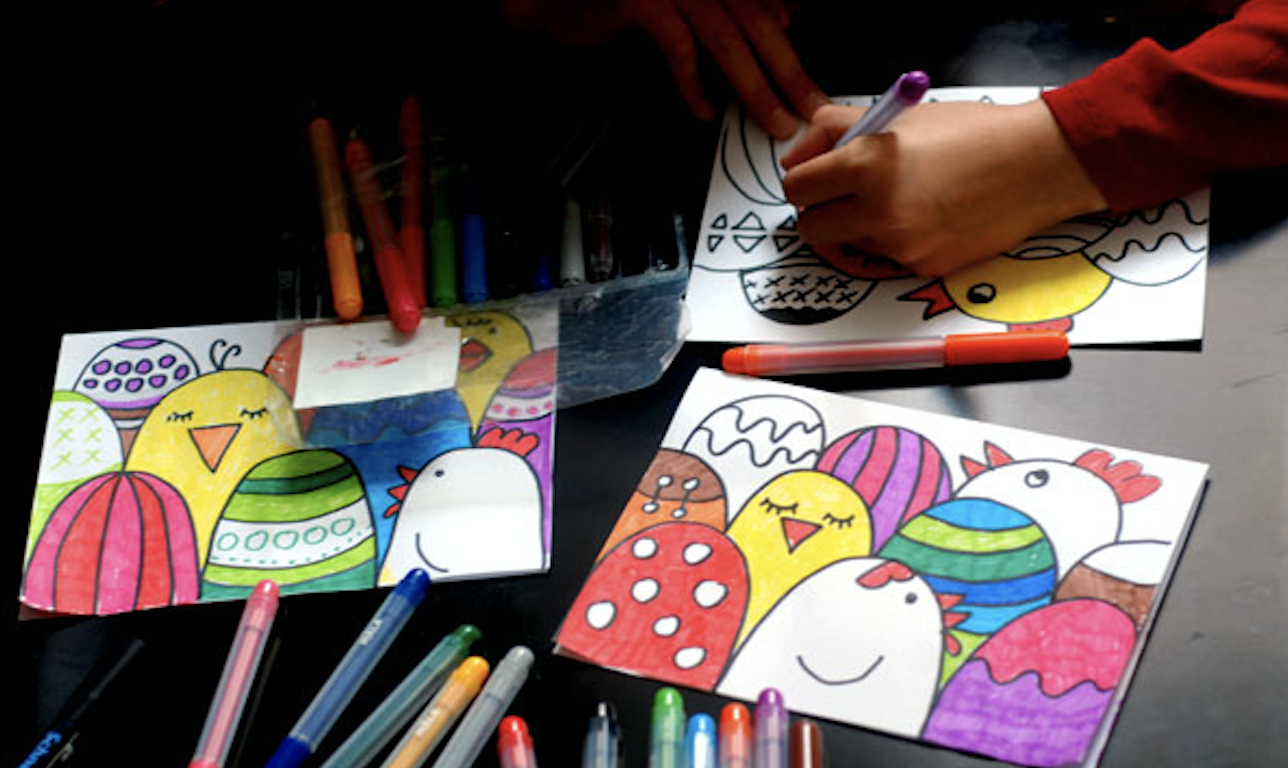
Also, remind your parents to take you a picture with your work and send it to me for our online gallery.
Send artwork pictures to [email protected]
source: www.krokotak.com
